

I found this on dollarstorecrafts.com. What a cute idea!
Project estimate:
- Nail art glitter bottles, package of 8 for $1
- Ribbon
- Beads
- One head pin for jewelry
- Pliers
Please note: These bottle are very small so they are not appropriate to give to children who still put things in their mouths. You may also want to consider gluing the lids onto the bottles depending on the age and activity level of the recipient.
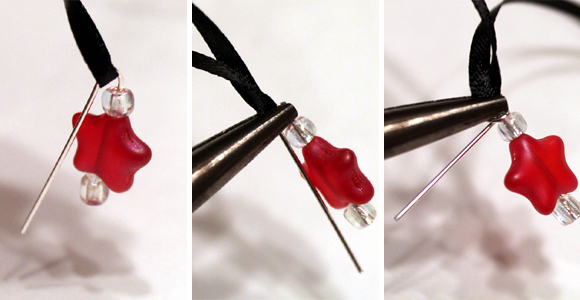
Step 1: Make the charm
Select beads that coordinate with the glitter and ribbon you will be using. String the bead(s) onto the head pin. Make a loop to attach the charm to the necklace as follows:
- Leaving some space above the top bead, bend the head pin down with pliers. (now is a great time to go ahead and loop it around the ribbon instead of threading the ribbon through later)
- Grasp the top of the bend with your pliers.
- Using your hand or a second set of pliers, wrap the end of the head pin around the top of your charm.
- Clip off the excess and use pliers to press against loop.
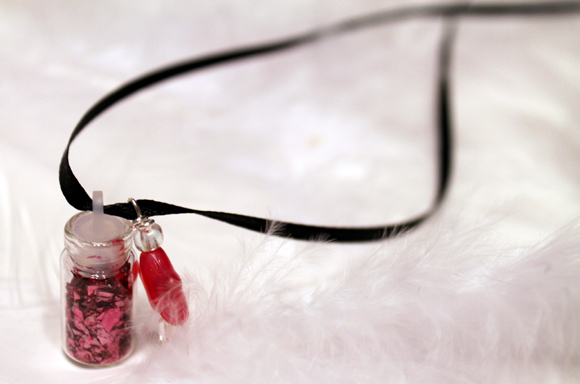
Step 2: Add the glitter
String your favorite bottle of glitter onto the ribbon with your charm.
Step 3: Make the necklace adjustable
That's it! Making these necklaces is quick and fun. You can coordinate your glitter color based on the occasion (just empty the bottles and refill with your glitter of choice): Make pink and red necklaces as valentine's gifts. Use green for St. Patrick's day. Or create an assortment for a pixie party and let each child pick their favorite color.
For more of what Carissa did with these, please follow this link: http://dollarstorecrafts.com/2012/12/tutorial-make-a-pixie-dust-necklace/
No comments:
Post a Comment